Sometimes people have trouble displaying a toolbar that isn’t visible, or a toolbar seems to disappear for no apparent reason. Here are some tips for displaying toolbars.

1st method
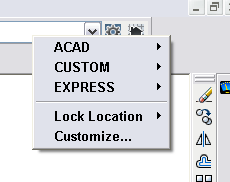
The easiest way to display a toolbar is to right-click any visible toolbar. This displays the list of all your toolbars, as you see here on the right. Just pick the one you want to make it visible.
However, certain custom toolbars, and the Express Toolbars aren’t listed. To find them, right-click any blank (gray) area next to a toolbar. Click ACAD to find the same toolbars you’d get by right-clicking a displayed toolbar.

Tips: If all your menu has disappeared, quickest thing to try out first is to use MENULOAD command to reload the menu. Also make sure to Choose Classic as the workspace
2nd method
If you know the name of the toolbar, another option is to use the command line form of the TOOLBAR command, by typing -toolbar. At the resulting prompt, enter the name of the toolbar. Then, at the Enter an option: prompt, press Enter to show the default option, which is Show. Here’s what it looks like:
Command: -toolbar
Enter toolbar name or [ALL]: dimension
Enter an option [Show/Hide/Left/Right/Top/Bottom/Float] <Show>:
## Dynamic block is another great productivity tip to master. Sign up below to get your Free tutorial on creating a complete dynamic block, including a drawing to practice on. You’ll make a movable chair, resizable desk, and more.
3rd method
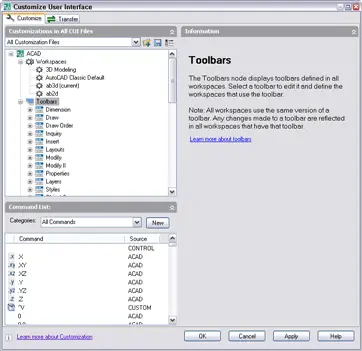
An alternative is to choose View> Toolbars. Starting with AutoCAD 2006, this opens the Customize User Interface (CUI) dialog box.

As you can see, the On By Default value is Hide. Click to reveal a drop-down arrow, and choose Show to display that toolbar by default.
4th method
An excellent way to control the display of toolbars is with workspaces. You can create a workspace that displays any set of menus, toolbars, and palettes (called dockable windows in the CUI dialog box). You can do this in 2 ways.
Display the toolbars that you want. In the Workspaces toolbar, choose Save Current As from the drop-down list. Enter a name and choose Save. Now, you can choose that workspace any time you want it from the Workspace toolbar (assuming you can find the Workspace toolbar!).
The post Display lost toolbars in AutoCAD appeared first on AutoCAD Tips Blog.

